Route description and planning guide
There are two west coast ski classics – Spearhead traverse and Garibaldi Neve traverse. Being easier of the two, Garibaldi Neve will likely be be your first touch with the glaciated landscape of the southwest British Columbia. The well established ski route is fairly mellow. The scenery, however, will be grand.
Trip planning
The Garibaldi Neve traverse is a “point A to point B” type so you will need to arrange for a car shuttle between the start (Elfin Lakes) and finish (Rubble Creek) or have someone pick you up at the finish line. The traverse is quite long, some 48 km in total, but the terrain is mellow. However, there are a couple of spots where you will need to carefully assess snow stability. In addition, a substantial part of the trip crosses large glaciers which are crevassed. In late season (Feb – Apr) snow fills in lots of the crevasses so you won’t even be able to see them but they are there and you need to be familiar with glacier travel protocols. Most people will not be roped up travelling on the neve but they will be (or should be) wearing a harness with prussiks and pulleys and a rescue rope at the ready.
Being on large glaciers, visibility will make or break tris trip. In a whiteout, there are no defining features to go by and you will likely not be able to navigate across the neve without a proven (and recent) GPS track.
Most people will do the traverse on skis, from south to north. However, given the terrain, doing it on snowshoes is also a very viable option.
The right time to do this traverse is Feb – Apr. The most important consideration will be “is the Garibaldi Lake frozen?” You need the lake frozen solid in order to cross it. And that sometimes doesn’t happen until late January. (Update: as of Feb 12, 2021 the Garibaldi Lake is fully frozen for the season). For descending down the Garibaldi Lake trail bring regular boot crampons, this trail can be a sheet of ice that I wouldn’t do even (or especially) on snowshoes.
Topo map and the route
Getting to Elfin Lakes
The starting point is from the Elfin Lakes parking lot, an extremely popular backcountry touring area with limited parking. The parking lot is at the elevation of 900m and accessed via an unpaved road plowed in winter. There is a clearly marked pullout about 3/4 way up where you will need to don snow chains (enforced) or risk a $115 fine.
The end point of the Garibaldi Neve traverse is at the Rubble Creek parking lot, some 35 km north of Squamish. Look out for “Black Tusk/Garibaldi Lake Trailhead” turn-off sign along Highway 99. The road to the parking lot is also plowed.
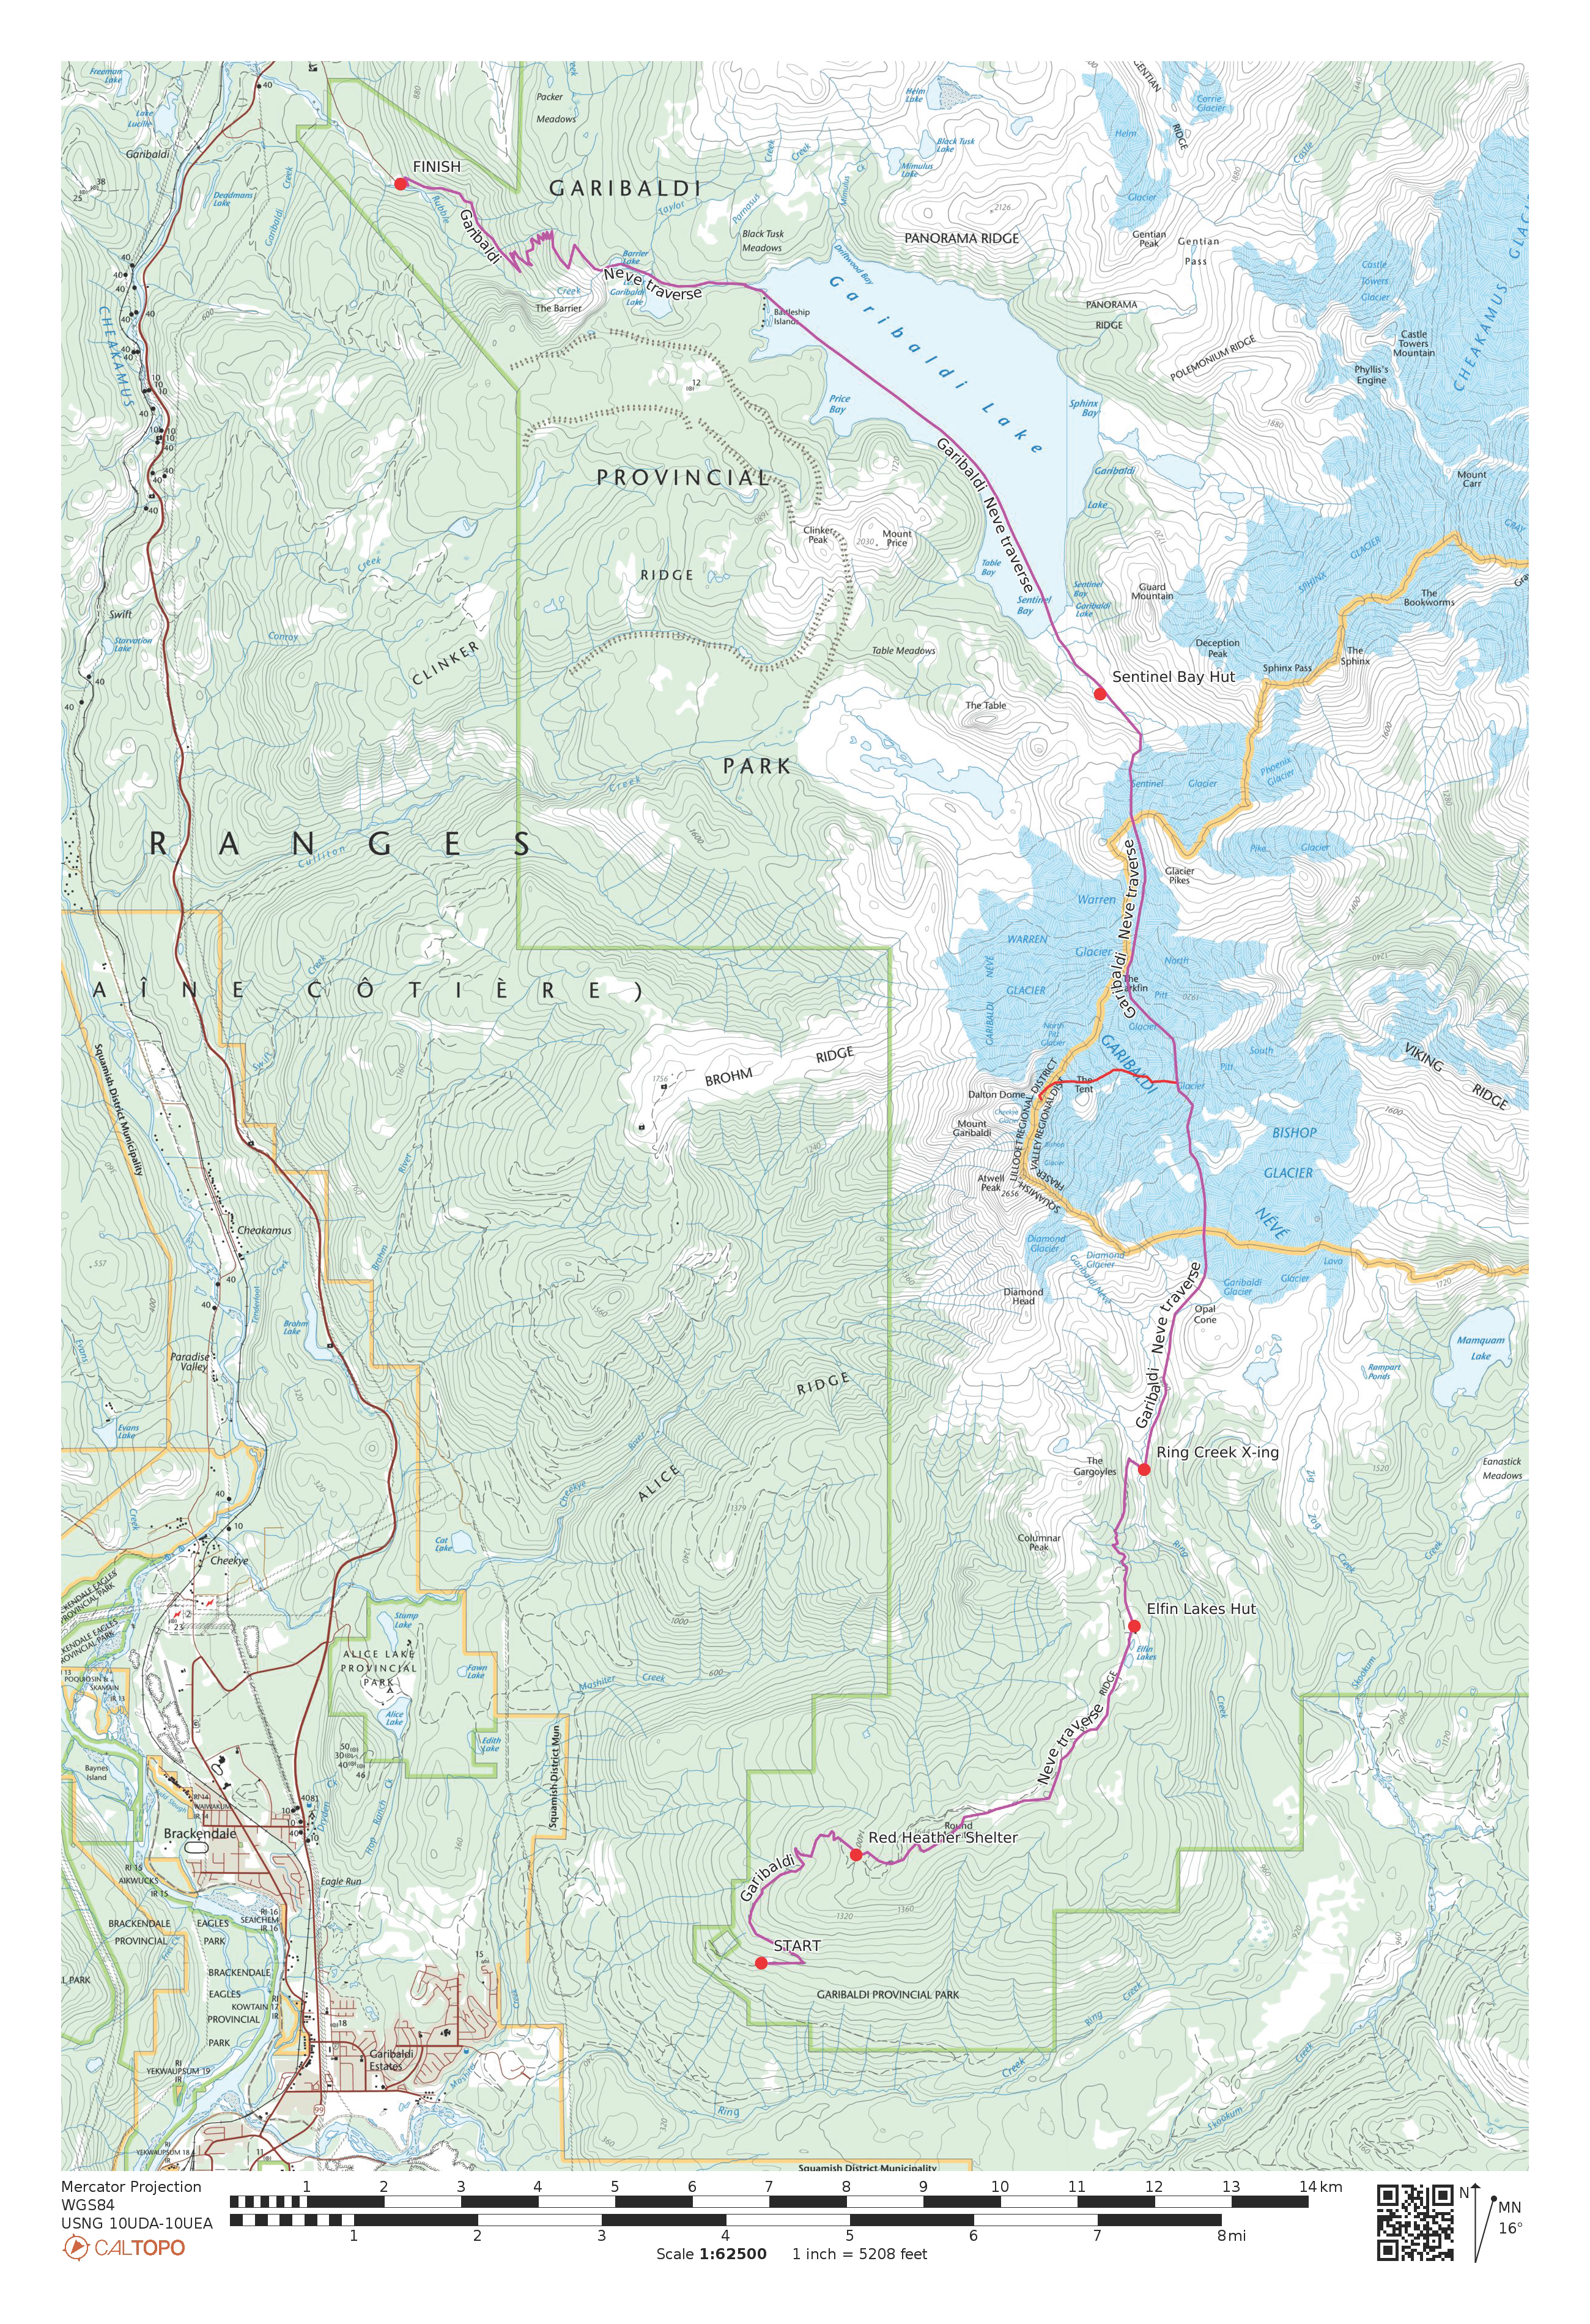
Back to the beginning: from the Elfin Lakes parking lot the first 4 km follows an old logging road. It should take about 1.5 hrs of moderately paced skinning to reach Red Heather shelter – a warming hut, really. You will hardly be alone on this leg of the journey so just follow the existing tracks. From Red Heather the route climbs up a very mellow slope to Paul’s Ridge.
From this point on the route is well marked with orange poles maintained by BC Parks and avoiding any avalanche terrain. Stick to this route especially in low visibility or if there is lots of fresh snow. The marked winter route will bring you to Elfin Lakes, some 10 km and 600 m vertical from the parking lot.
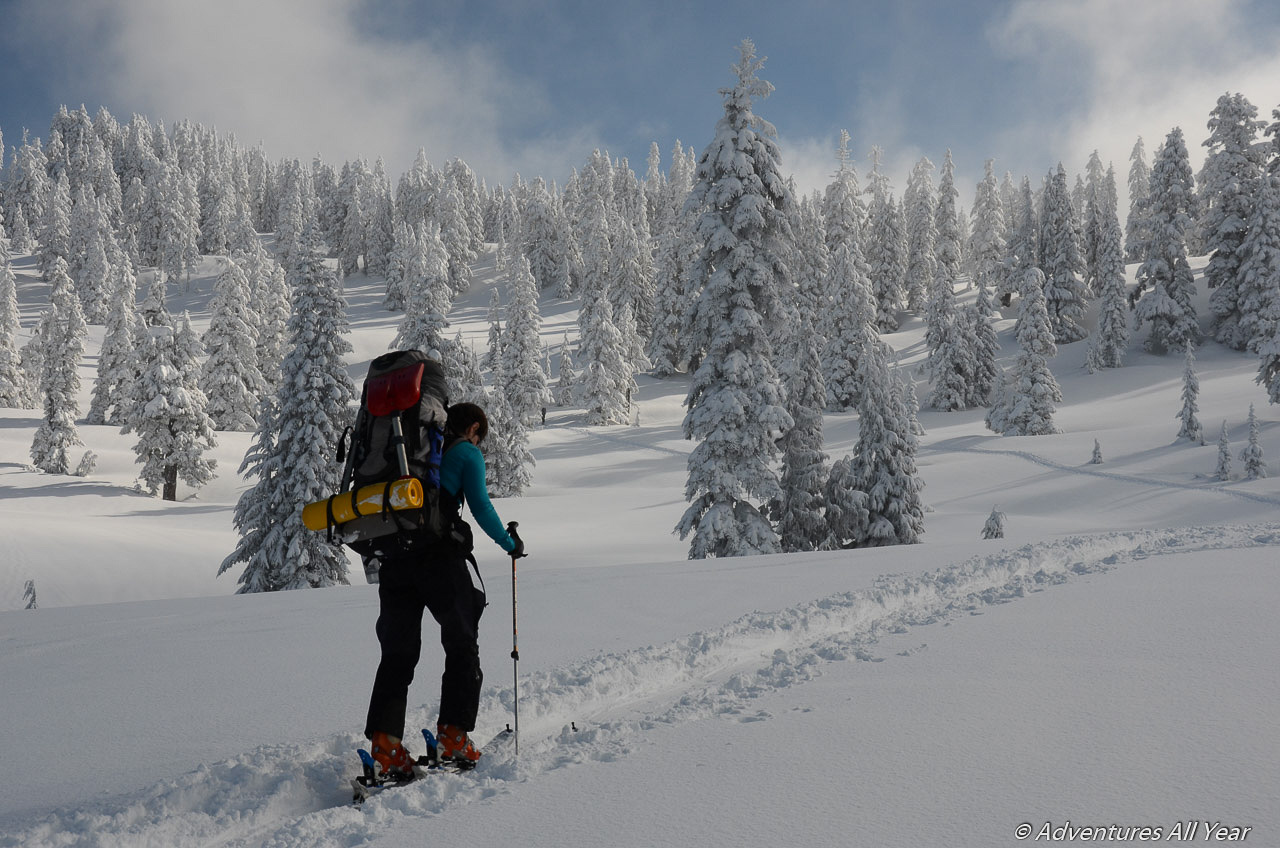
By this point it will likely be around 11 am and the sun might be out in full force. Take a good break here, rest up, have a snack. The next leg will require you to cross some serious east facing slopes so if the snow is solar-affected consider whether it makes sense to do this crossing after a night’s freeze instead. This will likely be more of an issue in spring or on a particularly hot day.
From Elfin Lakes to the Garibaldi Neve
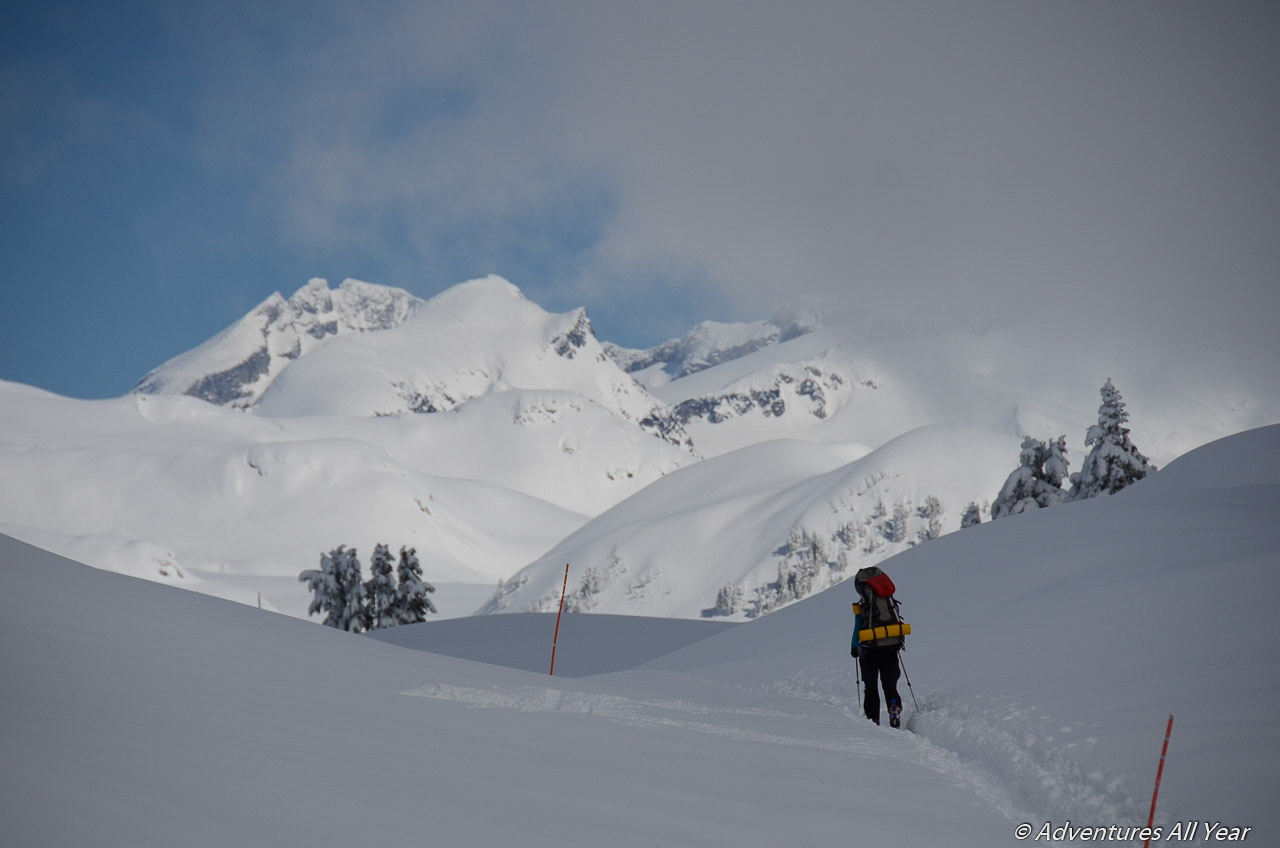
If you decide it’s good to proceed, make a s lightly descending traverse into the Ring Creek drainage, crossing several gullies off Gargoyles and working over potential avalanche debris from previous slides. This might be some heinous skiing but maintain elevation as much as you can, eventually dropping down to the creek and crossing to its east side. The PDF map shows where the summer trail crosses to the other side and that is the likeliest point where a snow bridge will exist.
If you are doing this as a 3-day trip once you top out of Ring Creek and enter the Neve proper (which is very flat at this section a.k.a. Garibaldi Glacier) you can start looking for a good place to camp, avoiding being too close to any large slopes. If you have your eyes on summiting Mt Garibaldi the following day then you will need to position yourself further along and about 400 m higher up on the Neve, somewhere by a rocky feature called The Tent. Consider all of this before you set out as this option would make for a very long Day 1.
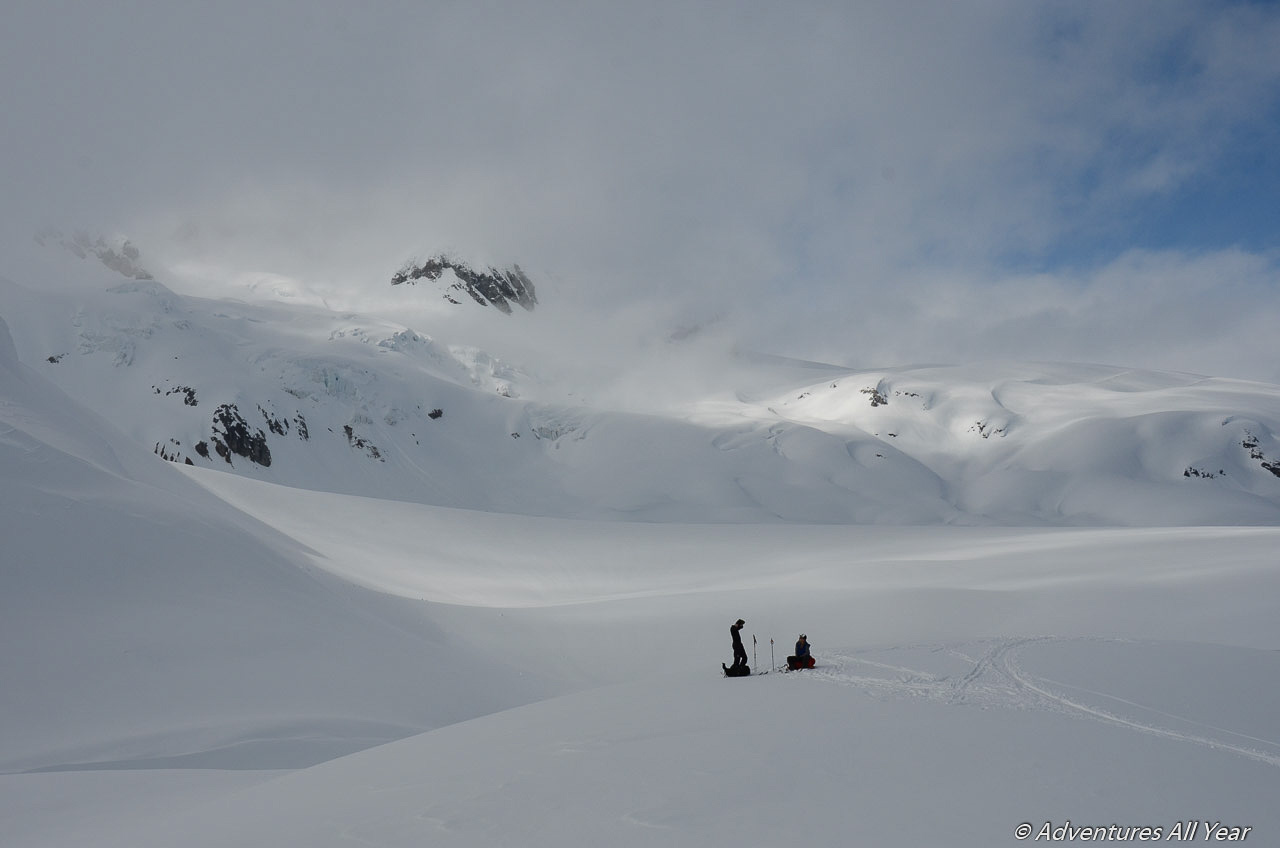
Already from this spot the views are astounding. This is big terrain with some impressive looking peaks to the east. If it’s not cloudy you are guaranteed to have an unforgettable evening on the Neve.

To the Neve high point
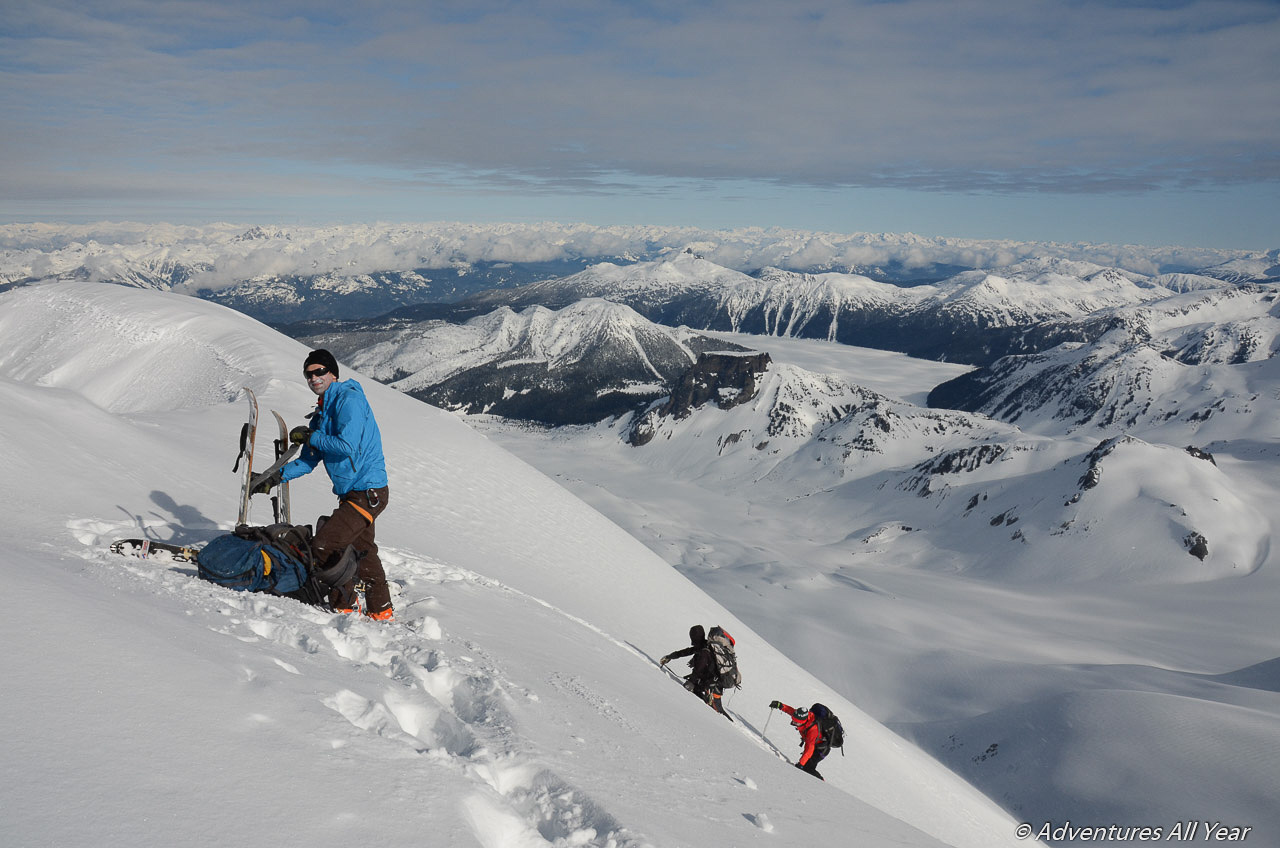
When crossing the initial flat part of the Neve (right after emerging from Ring Creek), you will have Atwell Peak, Mount Garibaldi and Dalton Dome on your left, it’s a prominent massif. Your next aim is to ascend ~400m vertical, curling slightly NW and aiming for a rocky feature called The Tent which appears sitting on a shoulder coming down from Dalton Dome / Mt. Garibaldi. You’d want to pass The Tent on its right /northeast side. Having good visibility would be a definite plus at this point so that not to get lured following the easiest route down into South Pitt Glacier.
Once you have cleared The Tent you have reached the Neve high point.
Climbing Mt. Garibaldi
The summit of Mt Garibaldi is a prized trophy that can be bagged on this traverse if the conditions are right. The winter route climbs up its NE face and is nothing more than a steep ~100m pitch of snow ascended by boot-packing it without a need to belay in soft snow. Make sure the snow stability is good. You will need an ice axe and possibly boot crampons. Later in the season a bergshrund, a wide & deep crack across the face, will open up and will need to be bypassed. Typically by as late as May the bergshrund is still passable on one side. Once it spans the entire face a different route needs to be selected or ropes and pickets used for belaying across it.
Once you ascend the face the summit is just a short distance away. Nearby Atwell Peak with its knife-sharp ridge will seem unreal. The views from the summit span from Howe Sound to Garibaldi Lake, the Sphinx and the far reaches of the vast Garibaldi Park.
Descend the same way. It’s possible to ski this face which is mostly 45 degrees with a short 50-degree section towards the top.
Crossing the Neve
The route across the Neve skirts some serious crevasse field on North Pitt Glacier spilling towards the drainages to the east. Generally, ascend and stay high at or around 2,000 m of altitude to avoid the worst of it. Again, this is a good reminder that you are on a glacier and even if you don’t see any obvious crevasses you need to follow glacier travel protocols (wear a harness, rope up if unsure, know how to perform a crevasse rescue).
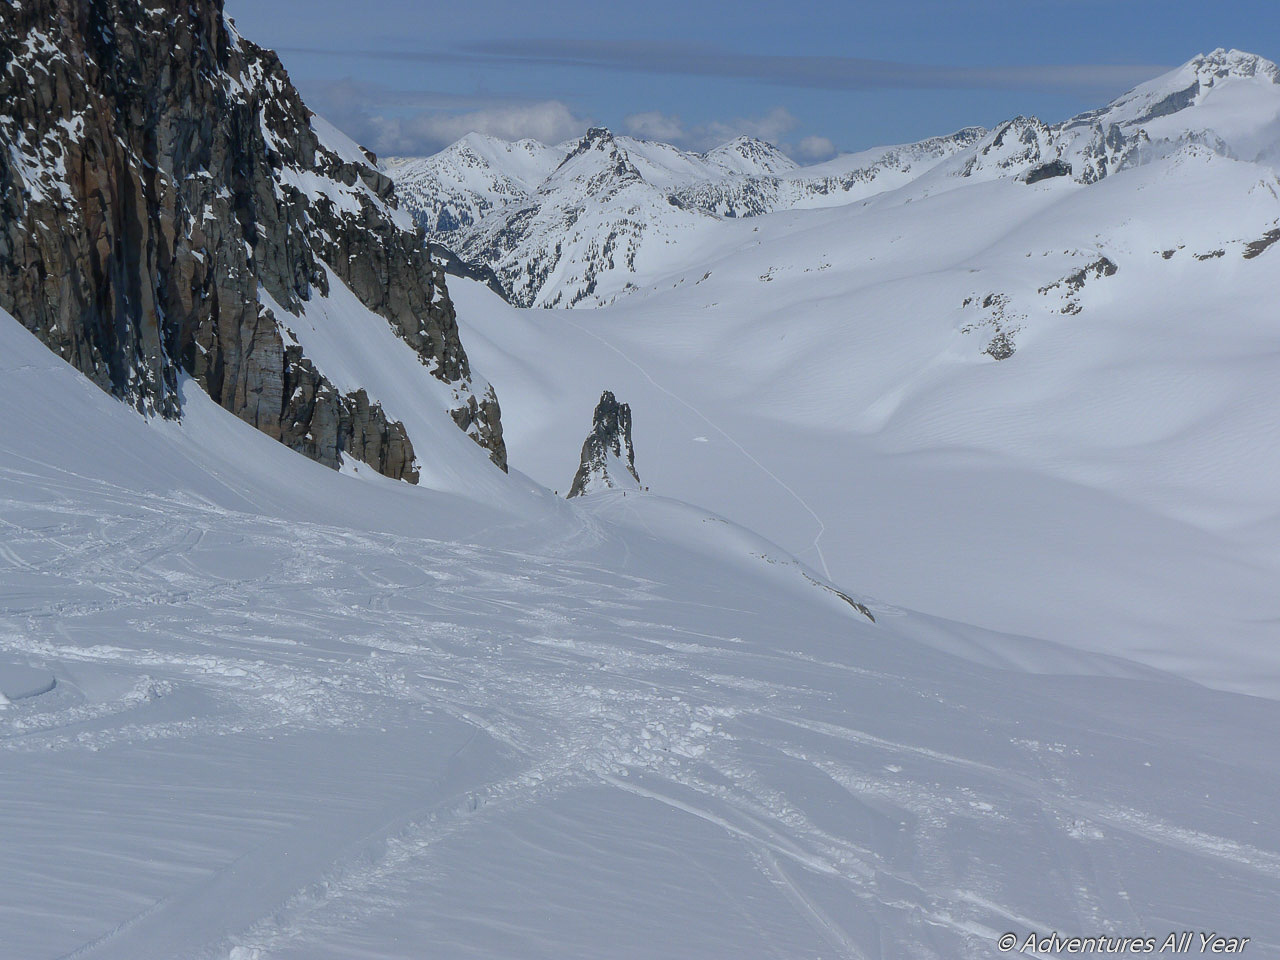
For visual reference across the neve aim for a prominent sharp rock fin protruding due north. This is called the Shark Fin. You can skirt around the Shark Fin tightly from both left or right but most years I’ve seen tracks passing it on the right. From this point on the route travels pretty much due north, first descending to Warren Glacier from Shark Fin and then ascending to a broad col W of Glacier Pikes peak before dropping down to Sentinel Bay.
You can check out a small glaciology cabin located here. This is also a very nice spot for Camp 2 is you are doing it as a three-day trip and is much quieter than the north end of Garibaldi lake which can see hundreds of day trippers on a weekend.
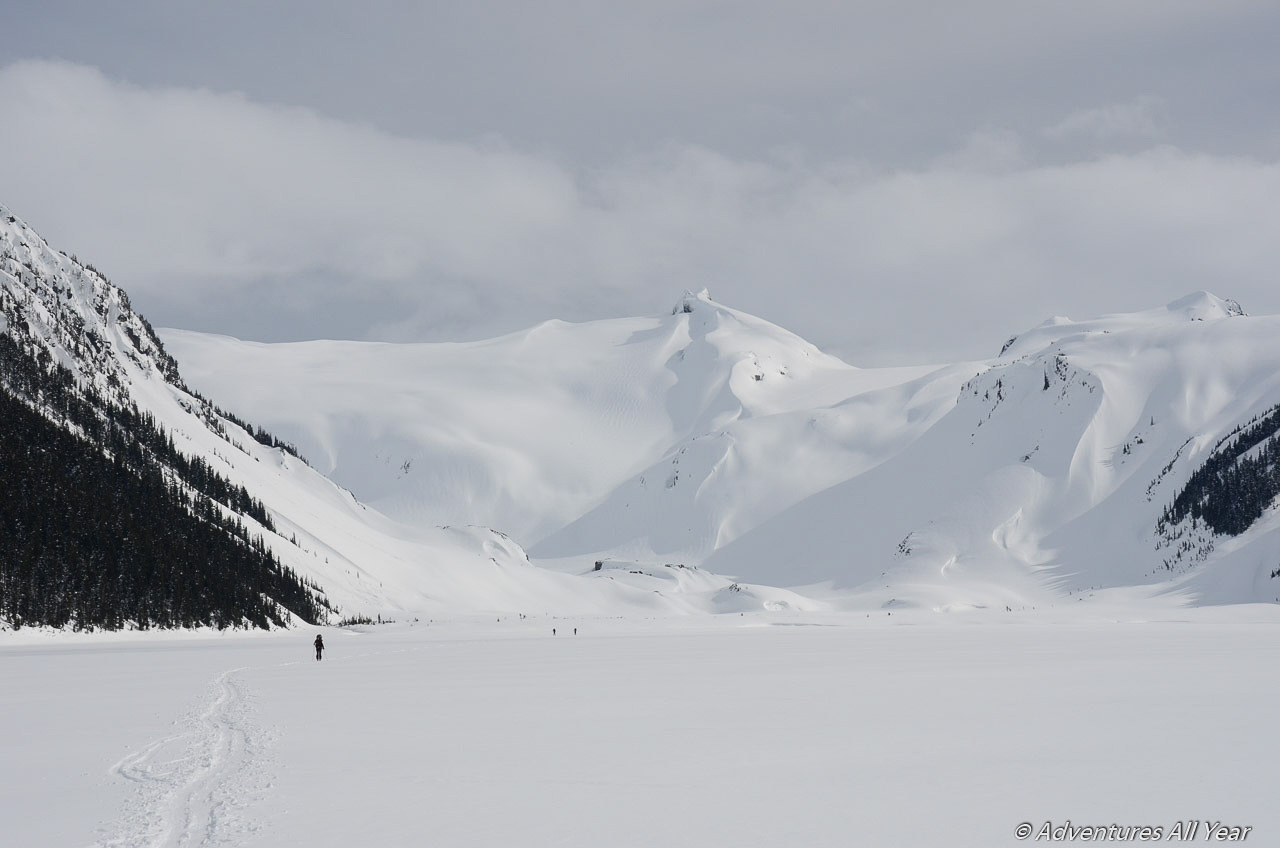
Crossing Garibaldi Lake from Sentinel Bay
Otherwise transition back to your skins and get ready for a very long and rather boring flat 6 km crossing of the frozen Garibaldi Lake. Depending on the snow this can take 1.5-2 hrs. Take breaks and look back on the Mt Garibaldi behind you and revel in your accomplishment.
Once at the north end of the lake all there is left to do it descend 10 km / 900 vertical m on the Garibaldi Lake trail. If there are no footprints to follow, pay attention to where the trail markers are pinned to the trees to make sure you hit the trail and follow it out (unless you fancy skiing “The Barrier” which is a chapter by itself).
Exit via Garibaldi Lake trail
Now, skiing down this trail is quite something. If there is some fresh snow on the ground this will be a quick affair, albeit on a narrow trail with some REALLY tight zig-zags in a steep forest so make sure you take the skins off and are making full use of your ski edges. If the trail is iced up, just put your skis on your backpack, whip out your boot crampons and walk down, this is a much safer option unless you love skiing with panic in your eyes.
The trail out will take you anywhere from 1.5 – 2.5 hrs but eventually you will emerge at the Rubble Creek parking lot. If you left your second vehicle here, this is it – well done, you guys!

Leave a comment